Peking Roast Duck
北京烤鸭
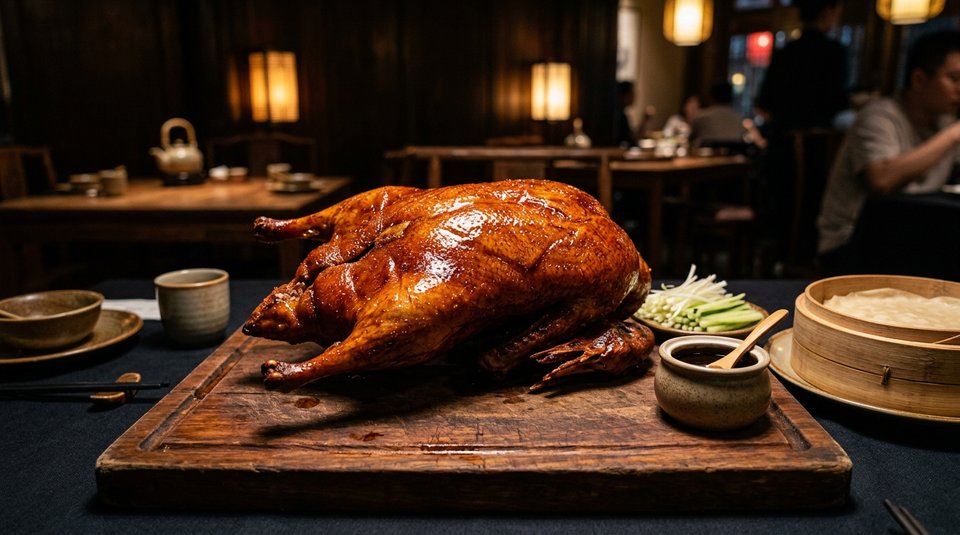
Description / 简介
Peking Roast Duck (北京烤鸭) is China's most celebrated culinary export and one of the oldest, most revered dishes in Chinese gastronomy, with roots stretching back to the imperial kitchens of the Ming Dynasty. The dish achieves something extraordinary: a duck with skin so crisp it shatters like glass when you bite it, while the meat beneath remains silky, juicy, and infused with the sweetness of rendered fat. The secret lies in two processes unique to this dish air-inflating the skin to separate
Ingredients / 食材
Whole duck 1.52kg (fresh or thawed)
Maltose syrup (/) 80g
Honey 30ml
White vinegar 30ml
Chinese five-spice powder 5g
Salt 10g
Shaoxing cooking wine 30ml
Fresh ginger 20g (sliced)
Scallions 3 stalks
Star anise 2 pieces
Bay leaves 2 pieces
Water 500ml
Instructions / 制作过程
Step 1: Clean, Season, and Air-Inflate the Duck
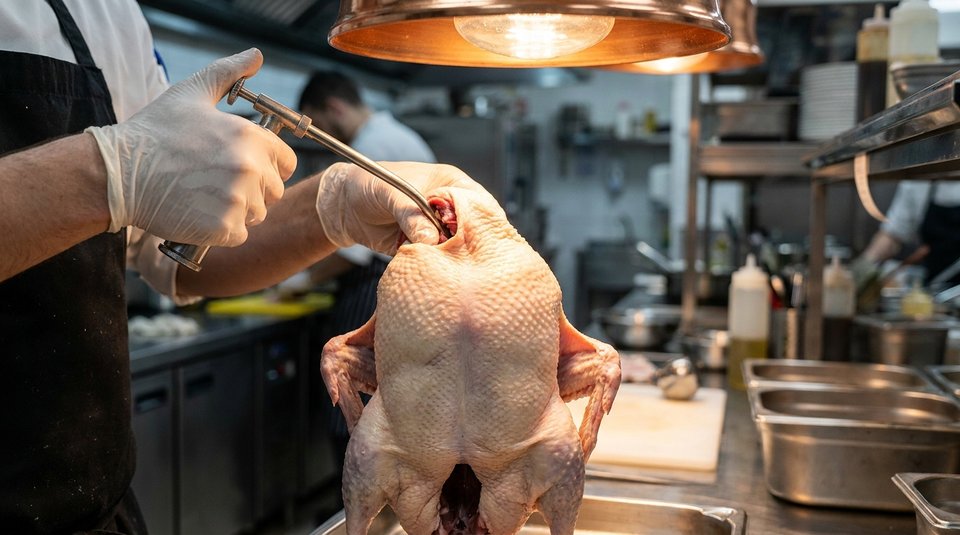
Rinse the duck inside and out, removing any remaining feathers and excess fat around the cavity. Pat completely dry with kitchen paper towels. Rub the inside cavity with half the five-spice powder and a pinch of salt. Stuff the cavity with ginger slices, scallions, star anise, and bay leaves. Using a small funnel or the tip of a drinking straw, gently blow air under the duck's skin through the neck opening working from the neck down toward the tail until the skin is visibly puffed up and separates from the meat. This step () is what separates the fat layer from the skin, allowing the skin to dry and crisp without the meat overcooking. If you can't inflate by mouth, ask your butcher to do it. Tie the cavity closed with kitchen twine and hang the duck in a cool, well-ventilated area.
Step 2: Air-Dry the Duck Completely
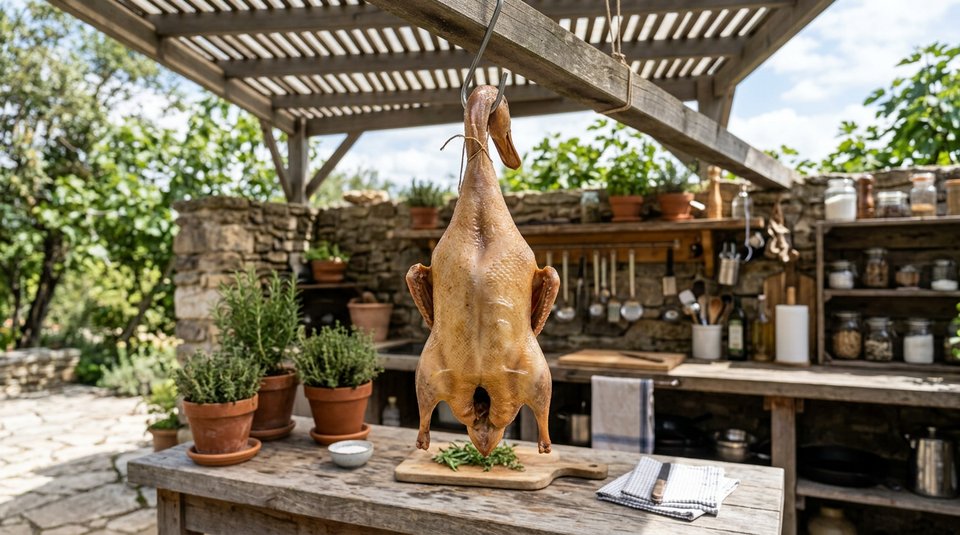
This is the most critical step for achieving truly crispy skin and the most overlooked. Hang the inflated duck in the coldest part of your refrigerator (or in a dry, breezy outdoor spot in cool weather) for 1224 hours, uncovered, until the skin is completely dry and feels papery to the touch. In warm or humid conditions, use a hairdryer on cool setting to blow-dry the skin every few hours. A dry skin = a crisp skin; a damp skin = a leathery disappointment. Do not rush this step.
Step 3: Apply the Crisping Glaze
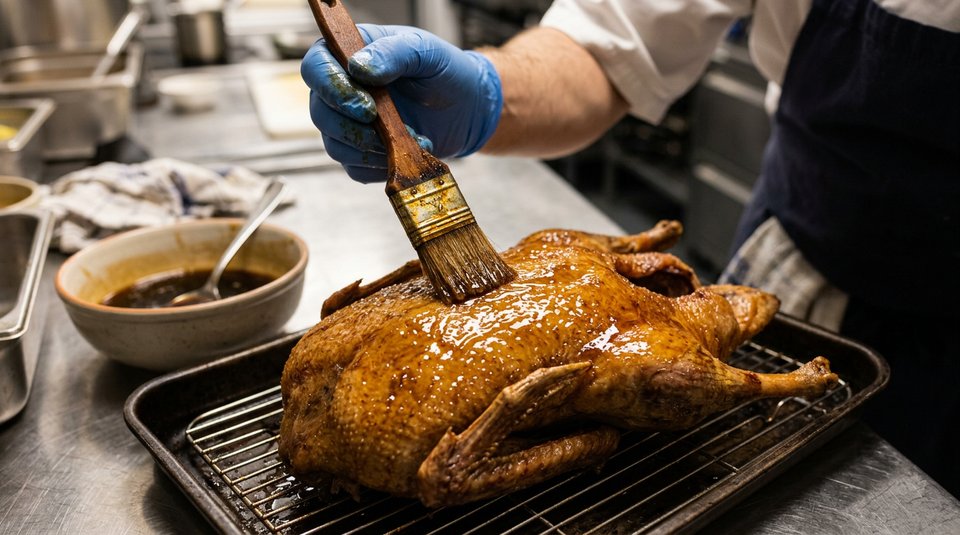
Combine maltose syrup, honey, white vinegar, remaining five-spice powder, and 2 tablespoons of water in a small saucepan. Heat gently, stirring, until the maltose dissolves and the glaze is smooth and glossy. Remove the duck from the fridge and let it come to room temperature for 30 minutes. Using a clean brush, apply the warm glaze evenly over the entire surface of the duck every inch of skin should be coated. Pay special attention to the breast and back, which take the longest to color. Return the glazed duck to the refrigerator uncovered for 23 more hours to let the glaze set and the skin dry again. Repeat the glaze application once more before roasting if time allows.
Step 4: Roast at High Heat
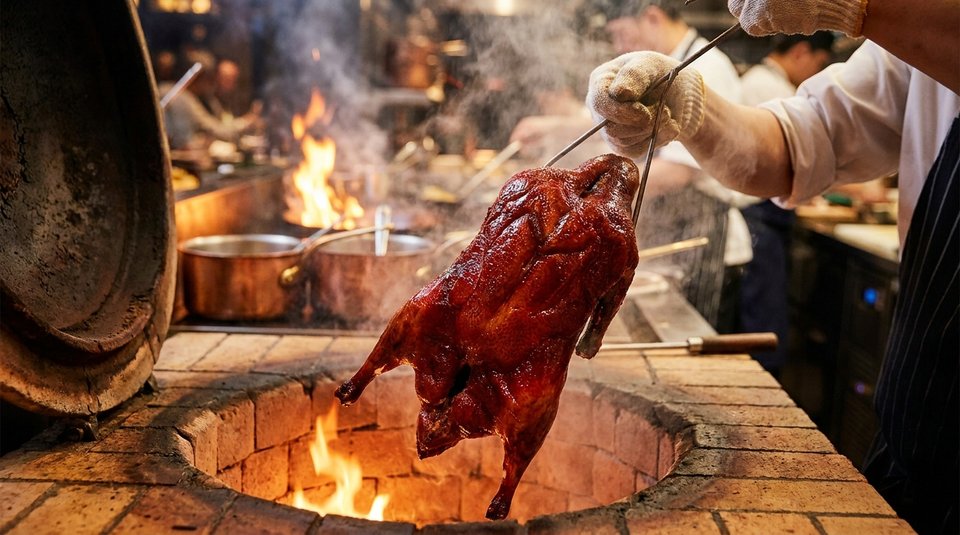
Preheat your oven to 200C (400F) with the fan on if available. Place the duck breast-side up on a roasting rack set inside a roasting pan. Pour 500ml of water into the bottom of the pan to catch drippings and prevent smoking. Roast for 30 minutes. Then carefully turn the duck breast-side down and roast for another 20 minutes this exposes the back skin to direct heat for even crisping. Finally, flip breast-side up again, increase heat to 220C (430F), and roast for 1520 minutes until the skin turns a deep, lacquered mahogany brown and fat is visibly dripping. The internal temperature should reach 75C (167F) at the thickest part of the thigh. If any areas are browning too quickly, shield them with small pieces of foil.
Step 5: Slice the Duck Table-Side
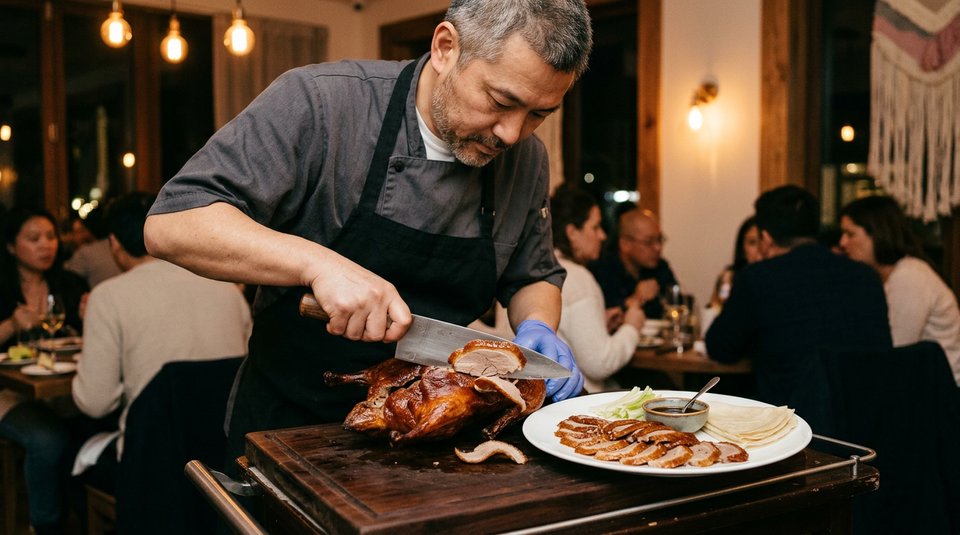
Let the roasted duck rest for 10 minutes before slicing this allows the juices to redistribute so the meat stays moist. Resting also allows the skin to set and become even crispier. Use a very sharp Chinese cleaver or carving knife. The traditional "108-knife" method slices the duck into paper-thin pieces, starting with the crispy skin (), then the meat (), aiming to keep skin and meat together on each slice. For home purposes, thin slices are all that matter about 0.30.5cm thick. Arrange the slices on a platter with the crispest, most beautiful pieces on top.
Step 6: Serve in the Traditional Way
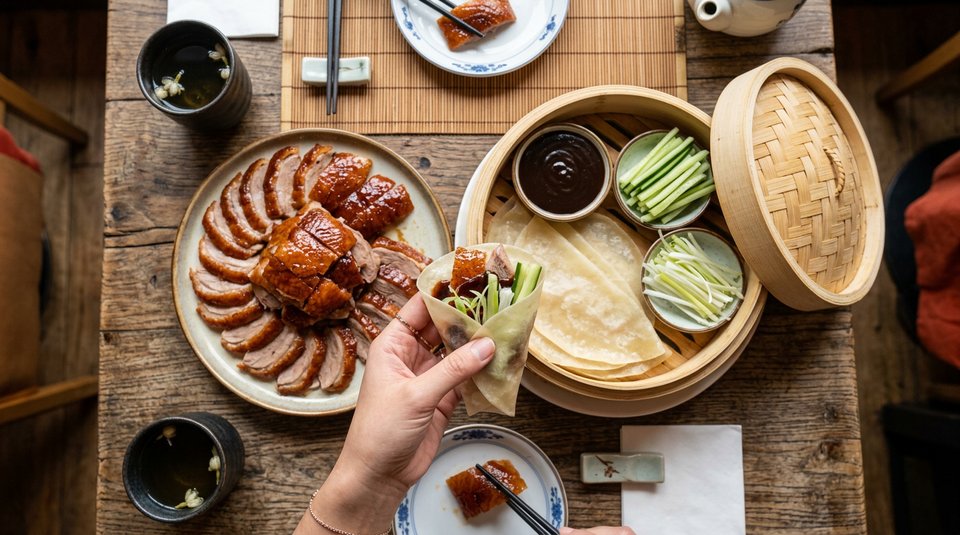
Warm the scallion pancakes (or Chinese flatbreads) in a steamer for 23 minutes. Arrange cucumber sticks, julienned scallion segments, and sweet bean sauce () on the side. To eat: spread a thin layer of sweet bean sauce on a warm pancake, add 23 slices of duck (skin + meat), top with cucumber and scallion, fold the bottom up, then roll and fold the sides inward to create a tight bundle. Each wrapper should contain the full experience the savory richness of duck, the sweet sauce, the crisp freshness of vegetables, and the delicate pancake.
Tips
- Choose the right duck: Pekin/Beijing duck is ideal at 1.52kg. Smaller ducks cook faster and crisper; larger ducks need more time and may have tougher meat. If you can only get a frozen duck, thaw completely in the refrigerator for 24 hours before starting.
- The dryer, the crispier: If you're short on time, the air-drying step is the one to compress. A hairdryer on high heat can dry the duck in 12 hours instead of overnight. Never skip drying entirely it's non-negotiable for crispy skin.
- No fan oven?: If your oven doesn't have a convection fan, rotate the duck more frequently (every 15 minutes) and consider placing it closer to the top heating element for the final 15 minutes.
- Rest before slicing: Never slice a hot roasted duck the juices will pour out and the meat will be dry. A 10-minute rest is essential.
FAQ
Can I make Peking Duck without a special duck or equipment?
Yes! A regular whole duck from the supermarket works, though it won't have the same fat layer as a Pekin duck. The key is the air-inflating and drying process these deliver results with any duck. A regular oven works fine; no special duck oven is needed.
Why is my duck skin chewy instead of crispy?
The duck skin wasn't dry enough before roasting. Moisture is the enemy of crispiness always dry the skin completely and apply the glaze at least twice before roasting. A second drying after glazing is what makes the glaze form a hard, lacquer-like shell in the oven.
Can I use honey instead of maltose syrup?
Maltose () is preferred because it has a higher glucose content that caramelizes at lower temperatures without burning easily. Honey can burn more quickly and produces a darker, slightly bitter result. If using honey, reduce the oven temperature by 1015C and monitor closely.
How do I use the leftover duck bones?
Never throw them away roast duck bones make an incredibly rich stock. Simmer with ginger, scallion, and water for 2 hours to make a nourishing duck soup, or freeze for later use in congee or noodles.
My oven is too small to roast the whole duck suspended. What can I do?
Place the duck on a roasting rack breast-side up. For the final crispy phase, you can also lay the duck flat just make sure to rotate it frequently for even browning.